Introduction
Experiencing a black screen on a computer monitor can be frustrating and alarming, particularly when one relies heavily on their device for work or personal use. Such an issue often signifies a disruption in the connection between the computer and the monitor, leading to potential loss of productivity. Understanding the common causes of a black screen is crucial to effectively troubleshoot the problem and restore functionality.
One of the primary factors contributing to this issue is a faulty connection. A monitor may not display any visuals if the cables are loose, damaged, or improperly connected. Issues with the power source can also lead to a black screen; if a monitor does not receive sufficient power, it may remain dark despite being turned on. Additionally, the graphics card in the computer plays a significant role. If there are driver problems or hardware failures, the screen may fail to output any display.
Other potential causes include incorrect display settings or compatibility issues, particularly if multiple monitors are in use. For instance, a user might mistakenly extend their display to a second monitor that is not connected, leading to a perception of a blank screen on the primary monitor. Hardware malfunctions, whether they relate to the monitor itself or the computer’s internal components, are another common trigger for black screen occurrences.
To address these issues effectively, it is recommended to approach troubleshooting systematically, starting from the simplest solutions, such as checking connections, before progressing to more complex assessments involving hardware components. By understanding these common causes and their implications, users can take informed steps towards resolving a black screen issue and restoring their computer monitor’s functionality.
Checking the Basics
When encountering a black screen on your computer monitor, the first crucial step in resolving the issue is to check all basic connections. This process may seem simple, but ensuring that each connection is secure can often solve the problem with minimal effort. Begin by verifying that your monitor is plugged into a power source. Ensure the power cable is firmly connected to both the monitor and the electrical outlet. A loose connection can prevent your monitor from receiving power, resulting in a black screen.
Next, check the power indicator light on your monitor, which reveals whether the device is powered on. If the light is not illuminated, you may need to examine the power outlet or try connecting the monitor to a different power source. If the monitor does not respond when plugged in, it may indicate a faulty power cable or an issue with the monitor itself.
Following the power assessment, focus on the connection between the monitor and the computer. This includes checking the video cable, whether it is HDMI, VGA, DisplayPort, or another type. Ensure that the cable is securely connected to both the computer’s graphics card and the monitor. A loose or damaged cable can often lead to a black screen, as the signal may not be transmitted properly. If possible, try replacing the video cable with a known working one to determine if the cable is the issue.
Furthermore, confirm that the correct input source is selected on the monitor. Many monitors allow users to select from multiple input sources, and if the wrong one is activated, a black screen can occur. Using the monitor’s buttons, navigate to the settings menu and verify that the input source matches the connection type you are using. By methodically checking these basic elements, you can quickly eliminate common issues and potentially restore functionality to your monitor.
Testing with Different Cables
When encountering a black screen issue with your computer monitor, one preliminary step that should not be overlooked is testing different cables. Modern monitors typically use HDMI, VGA, or DisplayPort cables for video input. Each of these types can be susceptible to damage or malfunction, which might lead to connectivity problems, ultimately resulting in a blank screen.
To begin testing, ensure that your computer and monitor are turned off. Disconnect the existing cable and inspect it thoroughly for any visible signs of wear, fraying, or bends. If any damage is observed, this cable should be replaced immediately. When selecting a replacement, it is advisable to use a high-quality cable that conforms to the appropriate standards for your equipment. For instance, HDMI cables are often preferred for high-definition displays, while VGA might still be used for older models.
To further troubleshoot, swap out the cable for another of the same type, or if you have access to different types (e.g., replacing an HDMI cable with a DisplayPort one), you should do so to rule out cable compatibility issues. After replacing the cable, power your monitor and computer back on to see if the problem persists. If the issue is resolved and the display returns, you have identified a faulty cable as the cause of the black screen.
However, if replacing cables does not rectify the issue, you may need to investigate other factors such as the monitor settings or the graphic card. Cables are often the simplest and most accessible items to test and replace when diagnosing a black screen, making them a critical step in the troubleshooting process.
Inspecting the Monitor Settings
When troubleshooting a black screen issue, one of the initial steps you should take is to inspect your monitor settings. This process can significantly impact whether your display functions correctly. First, ensure that the monitor is powered on, as a simple oversight could lead to the black screen issue.
Next, check the brightness and contrast settings of your monitor. Sometimes, monitors can have their brightness turned down too low or the contrast adjusted improperly. Use the physical buttons on the monitor or the on-screen display menu to increase the brightness and adjust the contrast to a level where images start to be visible. This adjustment can often resolve the black screen problem and enhance the overall quality of the display.
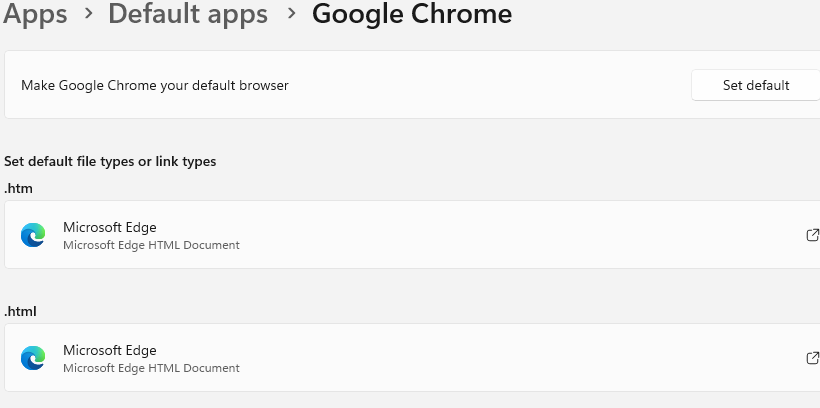
Additionally, it is essential to verify the input settings of your monitor. Monitors can accept different types of input signals such as HDMI, VGA, or DisplayPort. Ensure that the correct input setting is selected for the corresponding connection from your computer. Cycling through the available input options using the menu button on the monitor can help identify if an incorrect setting has been selected, which may lead to the black screen issue.
Furthermore, during your inspection, check for any factory reset options within your monitor’s menu system. Resetting to factory defaults can sometimes resolve any configurations that may be contributing to the connectivity problem. If the monitor settings have been appropriately adjusted and the black screen persists, the issue may lie elsewhere, such as with the computer or the connection cables.
Restarting Software and Hardware
When encountering a black screen issue with a computer monitor, one of the most effective initial troubleshooting steps is to restart the software and hardware involved. Restarting can often clear up temporary glitches that may be causing display problems, and it allows the system to reload settings that may have been improperly configured.
To begin, restart your computer. This can be done through the operating system’s standard shutdown procedure. If the display remains black and you cannot access the operating system, performing a hard reboot may be necessary. To do this, press and hold down the power button on your computer until it completely turns off. Wait for a few moments before pressing the power button again to turn it back on. This action refreshes the entire system, which can resolve many issues.
Next, consider restarting the monitor itself. Monitors can also experience temporary signal issues or failures. To restart the monitor, turn it off using the power button, disconnect it from the power source, and then wait for about 30 seconds before reconnecting and powering it back on. This process can help reset the monitor’s internal components and re-establish a proper connection with the computer.
If you use intermediary devices such as docking stations or external GPUs, it is advisable to restart these components as well. Disconnect all cables, power down the devices, and wait for a brief interval before powering them back on. This can ensure that any potential communication disruption between devices gets resolved.
In conclusion, restarting both the computer and monitor, along with any intermediary devices, is a straightforward yet effective troubleshooting method for addressing black screen issues. This simple step can often restore functionality and improve overall performance.
Updating Graphics Drivers
Updating graphics drivers is a fundamental step in ensuring optimal performance and resolving display issues such as a black screen. Graphics drivers are essential software that facilitate communication between your operating system and the graphics hardware, making timely updates crucial for maintaining functionality and performance.
To begin the process of updating your graphics drivers, you must first identify the type of graphics card installed in your computer. This can typically be done through the Device Manager on Windows. Simply right-click the Start button, select Device Manager, and expand the Display adapters section. Here, you will find the name of your graphics card, allowing you to proceed with the update process.
Once you have identified your graphics card, visit the official website of the manufacturer—such as NVIDIA, AMD, or Intel. On these sites, manufacturers provide a dedicated section for drivers and support. Search for the most recent drivers by entering your graphics card model, and follow the prompts to download the necessary files.
Alternatively, you can use the Device Manager to search for driver updates automatically. In Device Manager, right-click on your graphics card and choose Update driver. Then, select Search automatically for updated driver software. This method allows Windows to check for the latest drivers; however, it may not always find the most current version.
After downloading or updating the drivers, restart your computer to ensure that the changes take effect. This restart may resolve the black screen issue if outdated or corrupted drivers were the cause. Regularly checking for updates can help prevent future display problems, ensuring a smoother and more reliable user experience.
Running Hardware Diagnostics
When faced with a black screen issue on your computer monitor, one of the initial steps to take is to run hardware diagnostics. Many modern computers, whether they are desktops or laptops, come equipped with built-in diagnostic tools designed to identify potential hardware problems that might be causing the display issue. This process is crucial for isolating the problem and determining whether the issue lies within the monitor, the graphics card, or other components.
To begin running hardware diagnostics, first, restart your computer. During the boot process, look for a prompt on the screen that indicates a key to enter diagnostics mode, commonly the F2, F10, or Esc key, depending on the manufacturer. Consult the computer’s manual or manufacturer’s website if necessary. Once in the diagnostics menu, you will typically find options for various tests, such as memory diagnostics, hard drive tests, and system checks.
As you run these tests, pay close attention to any error messages that may appear. For instance, a common error related to the graphics card might indicate that the video device is not responding, which may mean there is a connection issue or fault within the graphics card itself. Other messages may point towards failing RAM or a malfunctioning motherboard. Each error code or message you encounter is essential for understanding the underlying problem.
After the diagnostics complete, the tool may provide suggestions for resolving detected issues or prompt you to take further action. Carefully document any findings for reference, as this information can be critical when seeking assistance from tech support or when considering repairs. Ultimately, running hardware diagnostics is an efficient way to pinpoint the cause of the black screen and determine the next steps towards resolution.
When troubleshooting a black screen on your computer monitor, it is essential to consider various external factors that could impact the connection. One of the primary aspects to evaluate is the age of the monitor itself. Older monitors may have outdated components that may not fully support contemporary technologies, leading to connectivity issues. For instance, if your monitor is several years old, it may struggle with newer display resolutions or refresh rates, which can result in a black screen or flickering display.
In addition to age, compatibility issues between the monitor and the connecting devices can significantly affect performance. As technology evolves, certain interfaces may no longer be supported. For example, a monitor with VGA connectivity might reasonably have difficulty displaying video outputs from a modern laptop solely equipped with HDMI or DisplayPort outputs. Thus, ensuring compatibility between your monitor and the computer system is crucial for maintaining a seamless connection.
Another external factor that can cause connectivity problems is electromagnetic interference (EMI) from nearby devices. Devices such as speakers, routers, or even microwaves can emit electromagnetic fields that may disrupt the signal between your monitor and computer. It is advisable to position your monitor away from such devices to minimize interference. Moreover, using shielded cables can also help reduce the impact of EMI, promoting a more stable connection with enhanced display quality.
In summary, various external factors, including the age of the monitor, compatibility with new technology, and electromagnetic interference, can significantly influence the connection between your computer and monitor. Addressing these considerations is essential for effectively troubleshooting and resolving black screen issues.
Conclusion and Additional Resources
In addressing the black screen issue encountered with computer monitors, we have explored a range of potential causes and solutions. Initially, it is crucial to check the physical connections to ensure that cables and ports are secure and functional. Each component, including cables, adapters, and the monitor itself, plays a vital role in maintaining a stable connection.
Furthermore, software issues cannot be overlooked. Updating graphics drivers, adjusting display settings, and considering operating system upgrades are essential steps that can resolve many black screen dilemmas. If the monitor remains unresponsive post troubleshooting, hardware malfunctions should be investigated, starting with the power supply and moving to the internal GPU or the monitor’s own circuitry.
For those seeking additional assistance beyond the basic troubleshooting steps, an array of online resources is available. Forums such as Reddit and specialized tech support websites often provide invaluable community input, while manufacturers’ technical support pages can offer information specific to particular models. Additionally, instructional videos can elucidate complex processes, equipping users with visual guidance as they navigate solutions.
Overall, resolving a black screen requires methodical problem-solving and occasionally technical intervention. By systematically addressing the components and symptoms, most users can restore functionality to their monitors and ensure a seamless computing experience. Should the problem persist despite all efforts, professional repair may be warranted. For further information, consider reaching out to tech support or consulting detailed guides on the specific monitor or computer model you are using. Each of these measures can contribute to overcoming black screen challenges effectively.